Website performance has become more important than ever in recent years. Providing a fast online experience is one of the best ways to retain users, which in turn can lead to more engagement and conversions. On the other hand, poor site performance may result in a higher bounce rate and potential loss of sales. In this article, we’ll cover the first crucial steps to optimizing your WordPress site for speed.
Test Your Highest Traffic Pages
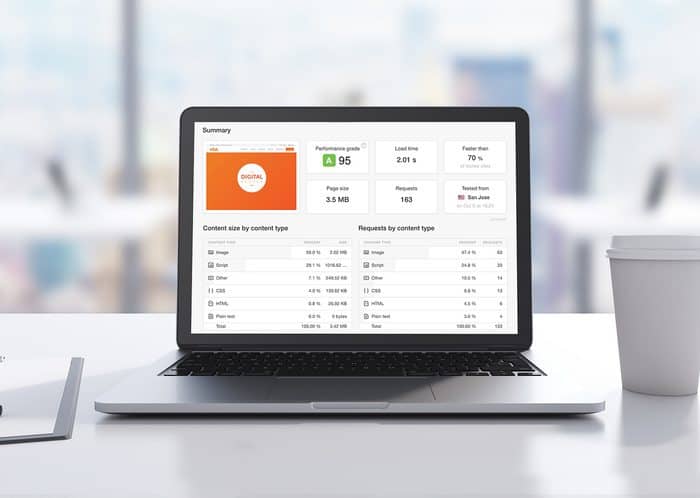
The first step to improving your website’s online speed is to locate your performance pain points. There are many online tools that can run a quick and free diagnostic for you; we recommend the following:
- Weborg (features robust reporting)
- Pingdom.com (features intuitive user interface and grading system)
Where to Start
The best place to start when running any site speed diagnostics is your home page. Just as you wouldn’t want your storefront to have a broken door, dirty windows and no parking, providing a slow or unresponsive home page is the quickest way to deter visitors from ever navigating to other pages.
Now that you have run the test, or are ready to do so, let’s talk a little bit about the information that’s provided and how it can be used to improve your site speed.
Page Size
The size of the page being loaded is the largest factor when it comes to how quickly your data is served and when visitors can begin interacting with it. Everything on your website contributes to the total page size — text, images and video, of course, and even fonts and scripts. A “heavy” page will result in longer load times, meaning visitors will be forced to wait to interact with your site’s content. If your web page is larger than 2 MB (2,000 KB) there is likely room for improvement.
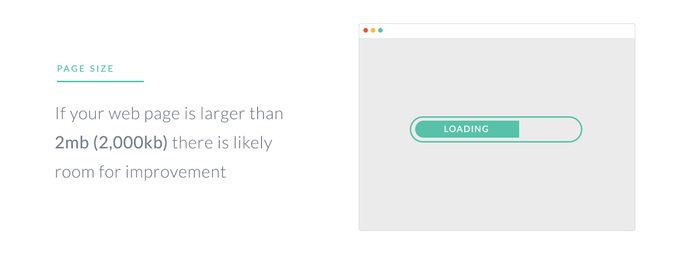
Image Optimization
The number one culprit for page bloat is un-optimized images. While good imagery can go a long way in making your website both visually appealing and relevant to the content that is being shared, failure to properly optimize your images can mean that perfect stock image you spent 30 minutes searching for is doing more harm than good.
The good news: Optimizing your images is easy.
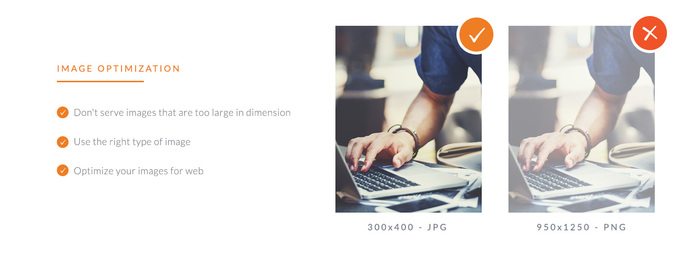
- Don’t serve images that are too large in dimension. When using the WordPress media manager, make sure you select the proper image size before embedding it into a page or post. No need for that thumbnail to be 1,200 pixels wide and shrunk down to 150 pixels.
- Use the right type of image. The right file type for the job is important. Most photographs and detailed images should be JPGs, but sometimes a PNG is necessary for transparency. Icons and logos can benefit both in quality and file size by using SVGs. By default, WordPress will not allow SVGs to be uploaded to the media manager. However, there are both plugins and developer-friendly functions that can help you implement this functionality on your site.
- Optimize your images for web. Most important, the file size of an image can be greatly reduced by saving the image at a lower quality or compressing it properly. Before uploading your images to your website, run them through a service such as tinypng.com. Doing so can greatly decrease the file size of most images, large and small.
WordPress Plugins
WordPress plugins are an amazing way to open your website to new functionality and add great features. However, far too often they are overused or left activated when not actually being used. Getting your plugins under control is a great way to improve site performance.
- Deactivate and remove unused plugins. Leaving a plugin activated likely means it is loading assets onto your site in the form of style sheets and scripts. Eliminate this by discarding of all unnecessary plugins.
- Keep plugins updated. Keeping your plugins up to date is important for both performance as well as site security and functionality.
- Ask yourself if a plugin is the right solution. Many plugins can be avoided by instead adding a small bit of code to your functions.php file in your WordPress theme. If you’re comfortable editing this file or working with a developer, using a function is always a better solution than a plugin.
- Weigh the benefits. Finally, ask yourself if the plugin is adding features to your site that will actually benefit your overall goal. If the answer is no or unclear, it might not even be worth installing it in the first place.
Caching is King
Caching is easily one of the fastest ways to see huge impacts on site performance. Without caching, WordPress requires queries to be sent back and forth from the database every time a page is rendered. With caching enabled, static versions of your pages are created and served to the user instead. These static versions load substantially faster than the normal process.
There are several plugins that can enable caching for your WordPress website. If you’re unsure which one to use, we recommended W3 Total Cache. W3 offers everything from basic caching to much more advanced services. No need to be overwhelmed — to get started, install and activate the plugin. Under General Settings, make sure the following three services are enabled and save your settings.
- Page Cache
- Minify
- Browser Cache
The three services above should work well on any hosting provider. If your site is running on a high-performance VPS or dedicated server, we recommend enabling Database and Object caching as well. Even better, if you’re using a hosting provider such as WP Engine that is optimized and built for WordPress, you don’t even need a plugin to enable caching.
Your Hosting Server
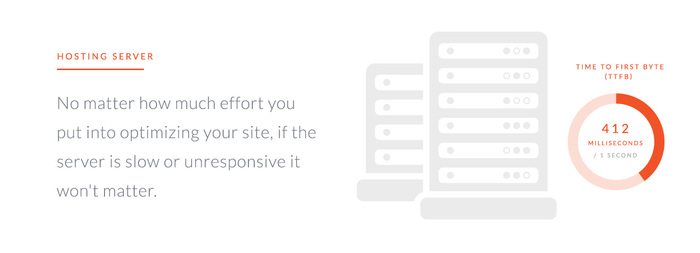
Your hosting server plays a very important role in overall website performance. No matter how much effort you put into optimizing your site, if the server is slow or unresponsive it won’t matter.
A great way to gauge your server performance is to check the time to first byte (TTFB), or the time it takes to begin loading the assets on your site. Using one of the performance tests mentioned above, if you are seeing a TTFB over 1 second, you may consider speaking with your hosting provider or moving to a different provider altogether. A good server can achieve TTFB in just under 200 milliseconds.
Rule of thumb when it comes to hosting: You get what you pay for. A good server can not only increase load times out of the box, there are many server configurations that can be enabled to further see performance boosts. Ask your hosting provider about the following features for an added speed boost.
- PHP 7 – Released in late 2015, PHP 7 offers a substantial performance boost to previous versions.
- HTTP/2 – HTTP/2 provides a significant improvement in how the server communicates with your browser, resulting in a large performance boost for your website.
- Gzip – Gzip compression is a method of compressing files, providing smaller file sizes that in turn load faster for your visitors.
Never Stop Optimizing
Optimization will never be a one-click process. Good site performance is an accumulation of good practice, due diligence, the right hardware and proper configuration. In addition to the strategies detailed above, there are many other ways to continue improving site speed, such as setting up a CDN, removing render-blocking assets, minifying your CSS and JS, and more.
Perhaps the most important thing to keep in mind: By optimizing your site performance, you are minimizing the number of visitors who’ll become impatient and decide not to wait around — and in this scenario, every fraction of a second counts.